
Things are getting real. We are edging towards lock up and we could not be happier with how it is coming together. Windows went in this week, and the house is ready for cladding.
The window frames were delivered by Maher’s Glassworks on Monday Morning and the builders got these installed over the next 3 days. The fixed part of the windows came unglazed to make them easier to handle and these will be glazed onsite later. The stacker door frames arrived on Wednesday and all the frames were in and the walls fully battened before Friday.
We ended up with matt black commercial aluminium frames, with double glazed lightbridge low e glass, and a combination of fixed and awning sashes.
Awning sashes wind out form the bottom, and whist they offer limited air flow, they seal well and look nice in long single panels. We originally specified casement windows which are similar but are side hinged, offering better airflow, but they are more expensive and are bulkier when in a commercial frame. With good modern air conditioning we figured the reduced ventilation was not an issue and were more interested in cost and aesthetics.
The windows are energy efficient and offer low U and solar heat gain coefficient (SHGC) values. U-value is the measure of thermal transmittance, which is the rate of transfer of heat through a structure. The better-insulated a structure is, the lower the U-value will be.
The SHGC is the measure of solar radiation admitted through a window. The lower a window’s SHGC, the less solar heat it transmits.
In our case a low U Value is more important than a low SHGC as all our windows will be shaded in summer, although the low SHGC will be handy on any hot October or March days, when the sun is a bit lower in the sky.
It is amazing how the angle of the sun changes across the year. Less than a month ago the sun was streaming into the window openings and I thought to myself “gee I hope I have got the shading right”. Even though our cad software had told me it will, I still had a moment of doubt. But the sun is barely getting in now and I commented this to Kristian, who was experiencing the same with his recently built solar efficient home.
A lot of our windows are fixed, as you are always limited with the size of openable sashes. In the kitchen meals family area, the stacker doors provide all the ventilation required, so the rest of the windows in this space are fixed.


On Friday we had a masterclass from Anthony Ryan on metal cladding. Anthony was sent up by Metal Cladding Systems, who supply to Dahlsens Swan Hill, to measure up, work out set out and advise Kristian. There was an awful lot to take in, and I am still yet to debrief – will do this afternoon (Saturday) at 4pm sharp in a shed over a couple refreshments.
The various metal cladding systems are not a budget solution, nor are they a DIY option, and they require either a professional installer or guidance from one. A straight wall without opening is simple enough and can be tackled without a professional, however it gets a bit more complicated when you add windows and doors. Particularly when one of your doors is a flush mount tilt door to be clad with the same cladding….
The garage door frame is ready and will be installed on Tuesday, and another chapter in the saga has been written. To recap, the issue with the garage door up to this point has been the weight, which meant we needed a lightweight aluminium cladding that could be installed on battens rather than plywood. This led us to Nailstrip, which seemed to tick all the boxes.
As I have said previously, you will experience resistance when you want to do something out of the ordinary. Often for good reason, so you need to have an open mind as well as the determination and room in your budget to get it done. As it turns out there is a reason that I have not seen many flush mount garage doors clad with standing seam type cladding on Pinterest: because it is almost impossible. It can be done with a counterweight door that can take more weight but is triple the price.
Straight off the bat Anthony tried to steer us away from using Nailstrip, which is similar to the standing seam profile, and towards Interlocking V25 which is what the main part of the house will be clad with. We quickly worked out that this part of the build will require his 25 years of experience, and that for it to work a different cladding profile will have to be used. I was happy to take his advice as I do not want anything half-baked and had flirted with the idea of using interlocking V25 here anyway. We can still achieve the contrast we were after by using a different colour. This has also opened the possibility of cladding the internal entry wall in the same material, which I am excited about.
Anthony brought some samples with him, which included the Nailstrip and Interlocking V25 profiles in various materials, such as Colorbond, Matt Colourbond, and Vestis Aluminum, as well as various colours, mainly shades of black and white.


Vestis is a highly durable polyester coated aluminium. It comes with a 40-year guarantee and will not fade as much as colobond. We were put onto this for our garage, as it is lighter than colorbond, and have been offered a good deal to upgrade to this everywhere, largely thanks to this blog. After talking to Anthony, we are convinced that the upgrade is worthwhile. Foam backing for the Interlocking panel was also recommended to make the panels easier to install, improve impact resistance as well as add to the thermal performance of the wall.
We are still fond of the Nailstrip profile, so will use this on our alfresco area where it ideally suited because there are no openings.
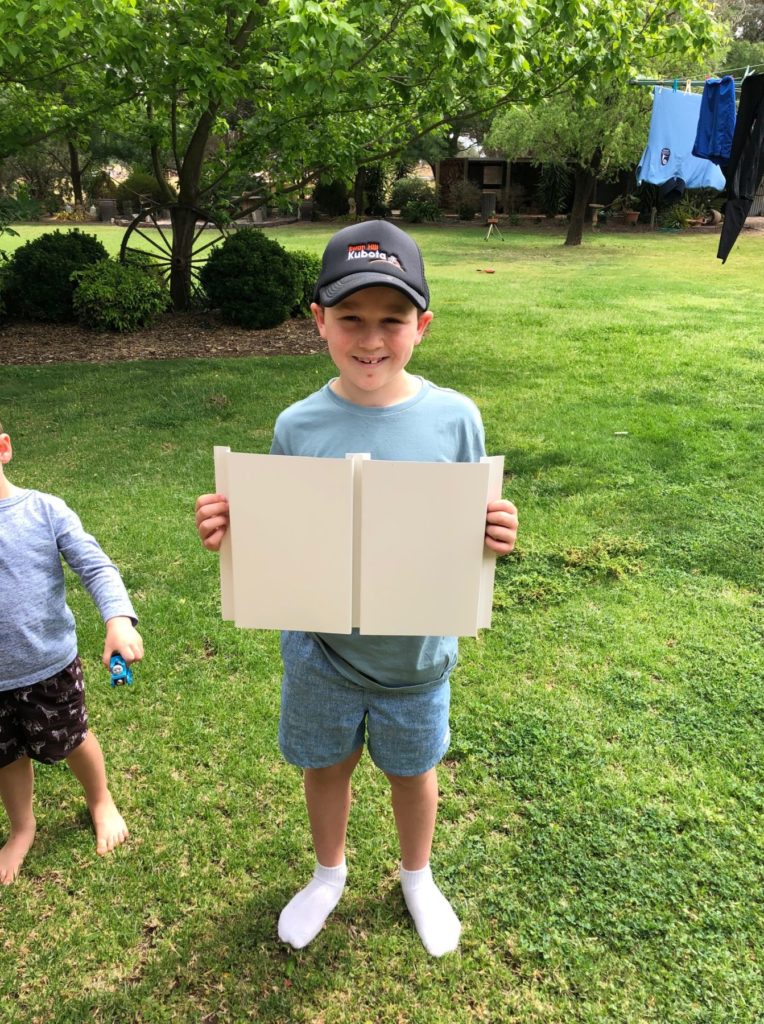
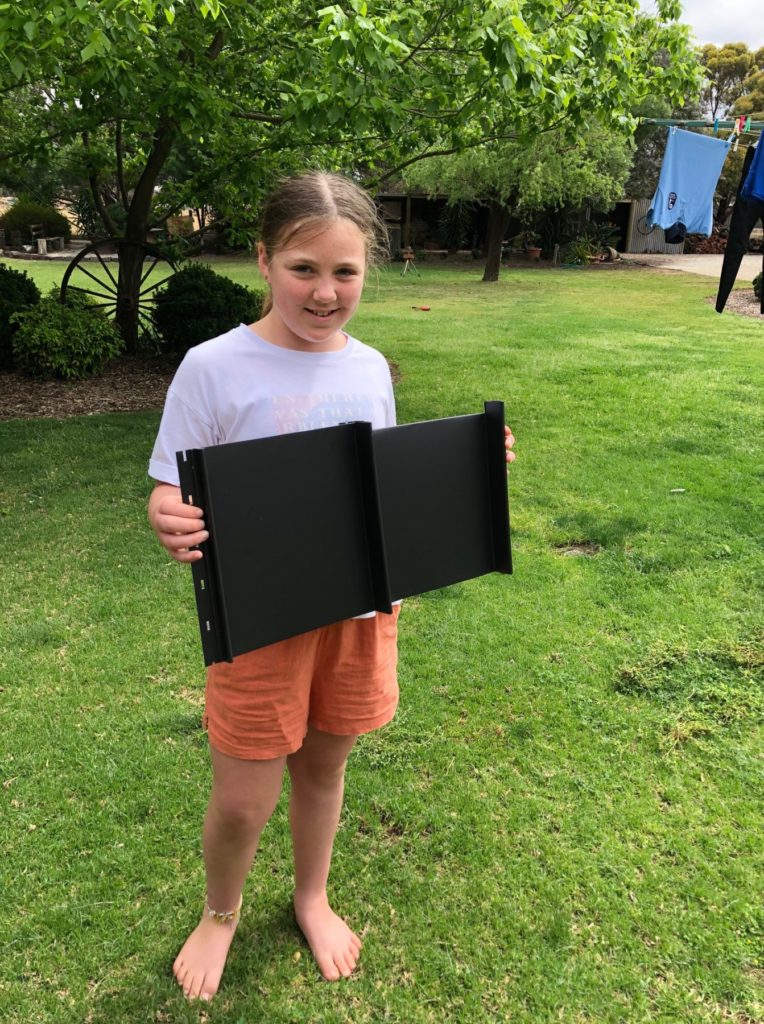
The colours we have selected are ‘pure white’ for the main part of the house and ‘black graphite’ for the features. See below:
Anthony worked his way around the house measuring each section of wall and between windows and calculated the custom panel widths and flashings required. He will order this now with Metal Cladding Systems, and hopefully it will be delivered later this week, or early the next. Anthony will come back up to clad the garage door, and get Kristian and Cody going. Whilst I was onsite Cody was busy framing up the bulkhead over our kitchen, and Darren Berry was there getting the return air ducts ready for the air conditioning system. I will not bore you with Air conditioning today, think I have unloaded enough on you…. if you got this far I guess you are interested enough in this game we call “building a custom house and sending yourself broke”.
