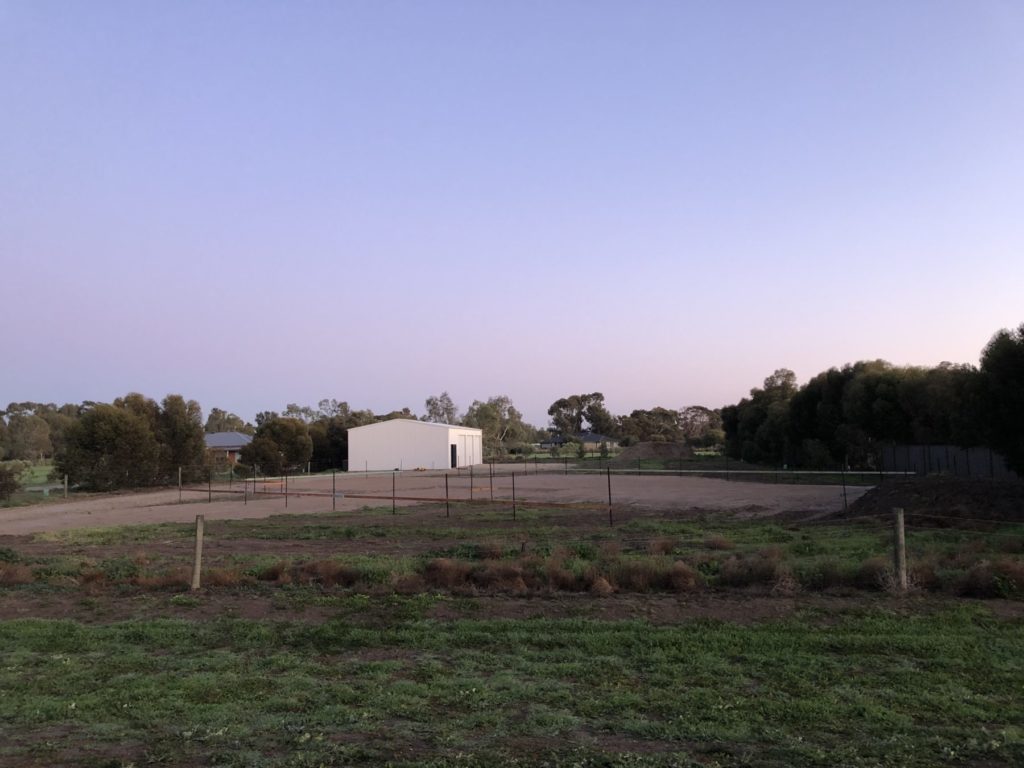
My wife (Jess) and I purchased a 4000m2 (1 acre) block about 10 years ago and have been planning this build since. It is in Kerang (northern Victoria), is flat, was free of vegetation, and has a good orientation. I deem a good orientation as a block that will allow your living area to face north, whilst maintaining privacy. We have since planted some boundary trees (platypus gums & other natives) and recently built a 16m x 9m shed. The site is in a quiet court and we now have Neighbours on each side, who have established trees on the side boundaries.
We have followed the usual McKnight & Bray design process, albeit with a lot more versions and revisions. It’s fair to say that if we were paying for the changes we would have been more concise… however it has been a luxury to make changes on a whim and the design has really evolved as we tweak it to suit every possible scenario.
So, the usual process consists of 4 stages:
- Schematic design
- Design development
- Preliminary construction plans
- Construction plans.
The design is refined, and levels of detail added in each stage. Client approval is required for each stage before progressing to give plenty of opportunity for review and adjustments, to ultimately minimize major changes. Major changes are time consuming once the plans are fully detailed, however can be made easily early in the piece.
Stage 1 – Schematic design:
First step is to establish a design brief. Here we need to work out what is important to the client and what rooms they would like to include. It is important to discuss your ideas with your partner, and be on the same page before seeing a professional. The more thought and discussion you have had the more efficient and cost effective the design phase will be. You may be unsure of some aspects, and you can leave these to discuss with your designer.
There is a lot of inspiration available online now a days, so browsing Pinterest, Instagram, etc and saving pics we liked was helpful, and is an easy way to show your designer the style you are trying to achieve.
Our brief included:
- Master bedroom with ensuite and walk in robe
- 4 bedrooms (for each kid)
- Small study
- Open kitchen/meals/family
- Walk in pantry
- Second ‘kids’ lounge
- Laundry
- Alfresco
- Double garage
- Modern facade
- Concrete floor
- Mixed cladding
- Skillion roofs
- Raked ceiling in living area
- Light with plenty of winter sun (energy efficient)
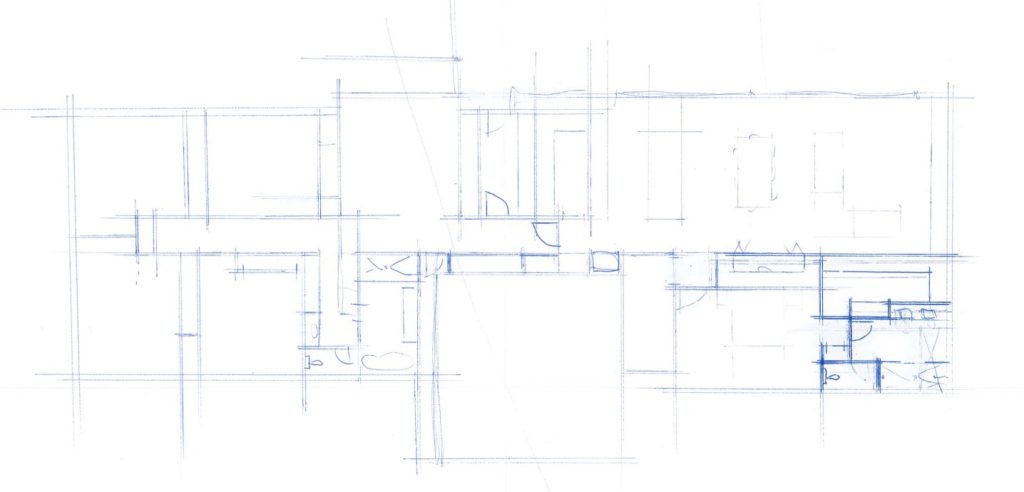
Once we had a brief I started to work on a layout. All at projects at McKnight & Bray start out with hand drawn sketches, which is an effective way to thrash out ideas and is more effective than trying to do it with CAD (computer aided drafting). This is probably my favourite part of my job.
Considerations for our layout included:
- living areas to face north to capture the winter sun for a) energy efficiency and b) comfort and mood boosting light. After living in a cold old weatherboard house with verandas and little sunlight, this was a priority.
- No west facing windows and limited East facing.
- Alfresco on north side but offset so as not to block main living area windows. We later compromised solar access to our kids lounge to have easy access to the alfresco.
- Kids lounge room close to bedrooms. Later decided to have this room double as an entertaining space that can be opened to the Alfresco.
- Garage close to kitchen with drop zone in between.
- Separate master suite from kid’s wing. Master at front for surveillance/security.
- L’dry close to kitchen. Have since decided to include it in kids wing for easy access from shed and clothesline.
- Spot to sit (coffee, read, etc) bathed in sunlight.
Budget is of course a limiting factor so once we had a rough layout, I worked out approximate floor areas. A rough guide is $1500-$2000/m2 of living ($14-18K per imperial square) for a nice family home with medium to high quality finishes, built by a reputable local builder. In this price you would also get a garage and alfresco area.
Early sketches came in around 270m2 (29 squares), so we were looking at $405-$540k. $540k was more that we wanted or could spend, but we thought somewhere in the middle would be ok. We therefore proceeded with the design but were conscious to reduce floor area and unnecessary expense where possible.
The 2 rules that I’ve learnt about building, and will no doubt repeat throughout this blog, is:
a) it will cost more than expected; and
b) it will take longer than expected.
It is therefore important to be realistic with your design brief.
So, work out what you are able to/willing to spend and have a loose budget in mind. It is a good idea to let your designer know of your budget so they can design the house accordingly or advise if your brief likely exceeds your budget.
Stage 2 – Design development:
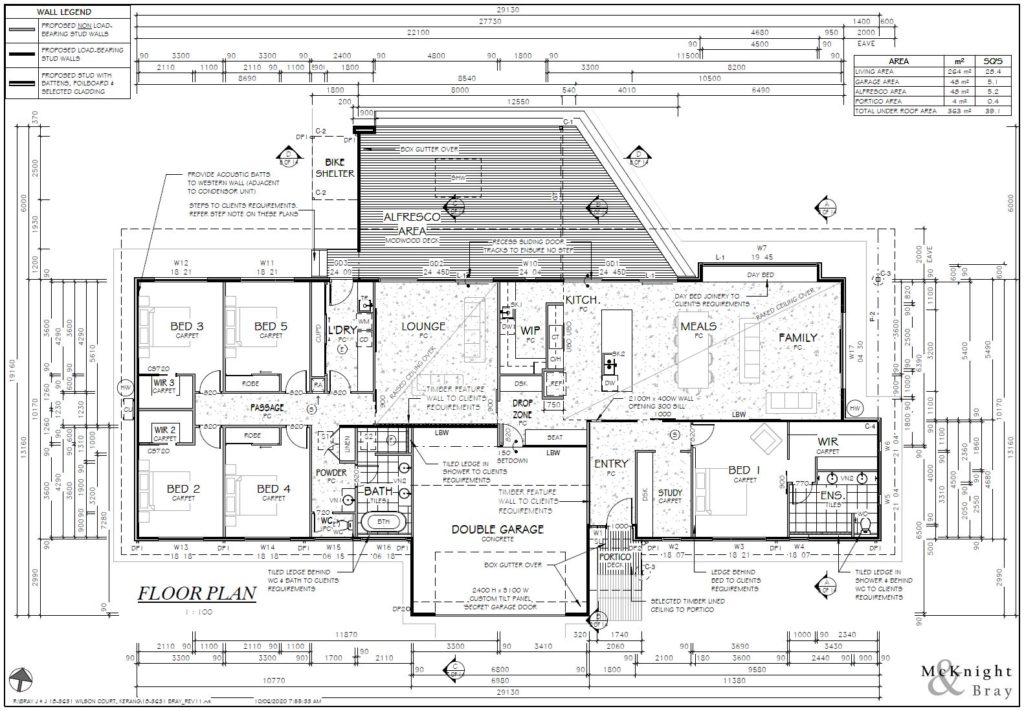
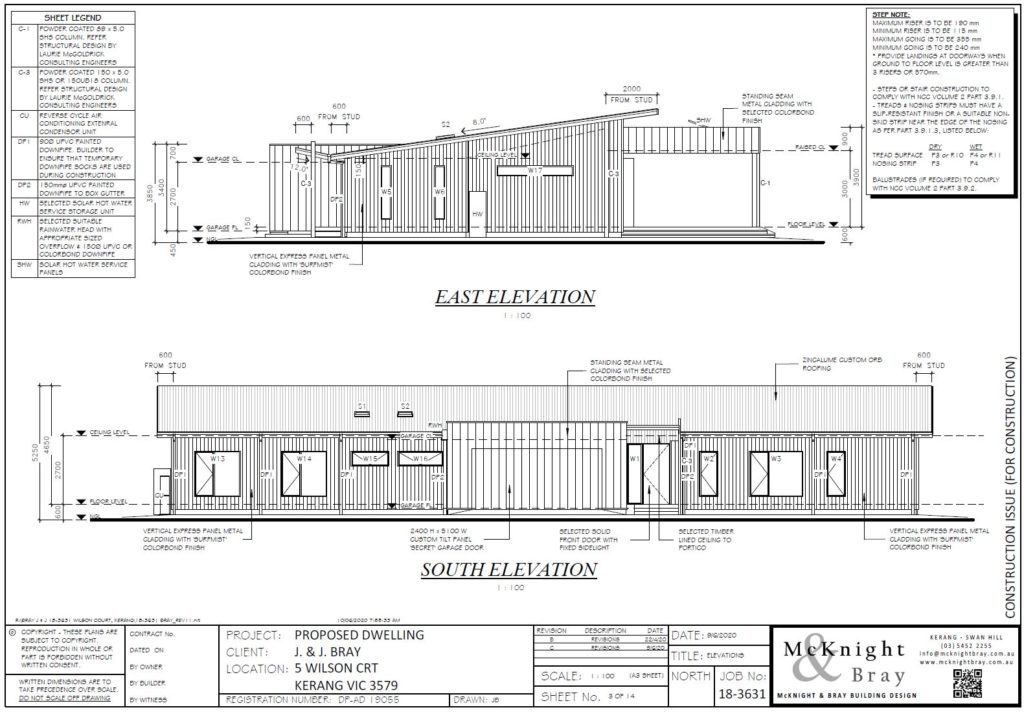
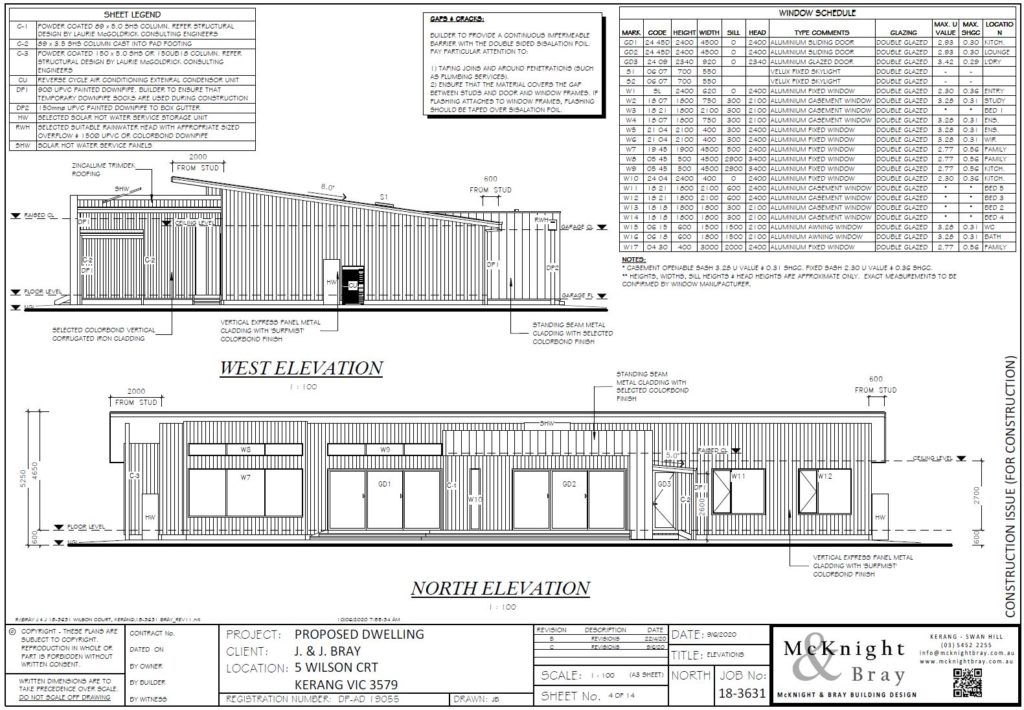
Once we had refined the sketches and were generally happy with the layout, it was time to draw it up to design development stage. This includes basic site plan, floor plan, elevations, and 3D perspectives. During this stage, the roofline and facade are designed, and we also worked out more accurate siting.
I wanted a clean and simple roofline and facade, that would be set off by the right material selection. To break up the skillion I opted for flat concealed roofs over the the garage and alfresco area. I designed the roof to slope up to the north to capture the winter sun, and the wide eave overhang was calculated to shade the summer sun.

To face north the house needed to be on an angle across the block. I think this adds some interest and better displays the skillion roof.
The next step was to take our plans to a builder to get an estimate. To assist with this, I worked out the main construction details and added it to the plans. We were fortunate not to have to search for a builder, as we were always going to use my brother Kristian (KM Bray Building). Kristian is known for his quality work and eye for detail, so we are in great hands. Locally we are blessed with many great builders, i cannot recall a bad word being said about any of them.
So, we got the plans to Kristian, who sent it out to his sub-contractors and then gave us a rough estimate for the build. Note that builders will be hesitant to give a price without all the details, however a ball park estimate is really helpful at this stage and provides direction as to whether you need to cut back on items, or proceed as is. It is much quicker/cheaper to alter a design at design development stage rather than at construction plans stage.
Stage 3 – Preliminary construction plans
The estimate was in our ballpark so we were happy to proceed. We still had to sell our current house, so we weren’t quite ready, but we wanted to build our shed so needed to get the house plans & other documentation done so we could get a building permit for both at once. We organized our other consultants, which included:
- soil test (GTS Bendigo)
- structural engineer for slab and the design of our high walls in our living area (Laurie McGoldrick Shepparton)
- Thermal Performance Assessment (energy rating, by our office).
- Land capability assessment for our Wastewater Treatment plant (Price Merrett Consulting). Note only required because we do not have a sewer connection and our lot is under 5000m2.
Whilst we were waiting on these, I detailed the plans ready for the building permit.
Stage 4 – Construction plans stage:
All documentation was finalized, and a building permit application was lodged with Brent Williams and Associates. We received the building permit in September 2019 and built our shed straight away but weren’t quite ready for the house. We eventually sold our house in October so arranged finance and booked Kristian in.
For our finance we went through Angus Finance, who is a local mortgage broker. They made it all very easy and I would recommend using a broker rather than a bank. We enquirerd with the bank but were just lumped with a pile of paperwork to fill out – no thanks. A broker looks for the best loan and provides more of a service.
Some time elapsed between our building permit and commencing our build. When we picked it up again, we looked at it with fresh eyes, and made some more tweaks. The key to house design is making sure the design works for the way you live, therefore there was a lot of discussion about how each space would be used, and we sought ways to enhance our day to day life.
I also spent a lot of time reviewing room sizes and made some reductions to the floor area (conscious of the first rule of building – it will cost more).
More detailed plans of each space were also drawn, including internal elevations, ceiling details, joinery details, etc. This further analysis lead to more tweaks…
Revised plans and engineering were re- submitted to the building surveyor and we were ready to go!


6 thoughts on “Blog #1: The Design Process”
You have done an amazing job and I can’t wait to see the job as it goes along, well done.
Looks great Josh, im looking forward to working more on our house, what aircon and heating are you going with?
Hi Kym,
we are going with a ducted reverse cycle system. Brent installed the same on his build and only needs to use it sparingly. The north facing windows will act like massive heaters on a sunny winter day, and the thermal mass of the slab will retain that heat during the night.
I look forward to sorting out your design, see you next week.
Looks great guys. It’s nice to see the process of a build explained and in detail and using of local trades.
Looks great Josh, I look forward to following your progress. We are also making progress with our project. We are excited to improve our homes thermal performance and our lifestyle thanks to your solar passive design for our extension.
Thanks Melisa, would love to see pics of your extension when complete. We will both appreciate sunny winter days!